

It’s been a couple of days…of no crafting time. Wednesday, I shopped at Sam’s after work; came home, packed all that in, put all that away, fixed supper, eat and was ready to bed. Thursday, I shopped at Wal-mart after work, price matched oodles of stuff; came home, had the Dale pack all that in (hee hee), put all that away, fixed supper, eat and then was ready for bed. Friday, I’m off! YAY. And I woke up at 1 AM with my sinuses dripping clear fluid. Ick. That set the stage for a low key Friday at home. Forget the WHB, I’m stamping. All day long…and had a nap, too.
Remember the day I went nuts with the onsie die? Those are going to be card fronts. One of the projects I worked on Friday was cutting card bases for those onsies die cut card fronts.
 |
| Pile of onsie die card bases |
 |
| Close-up of a single card base |
I cut up 12 x 12 Whisper White cardstock. Not really a biggie for me, as I rarely scrap a page with a white base. Notice on the die, there’a a row of dots?
 |
| Fold line on the PTI Onsie Die |
Here’s what it looks like before it goes in the Big Shot. Notice the measurements – cut my 12 x 12 to 12 x 5.5. I saved the 1 inch strip – I have a project for that 1 inch strip. I’m sure these are not the most CS efficient measurements; however, these are what I used. One onsie will have a Pear Pizzaz base.
 |
| Onsie card base measurements |
Here’s my pile of scraps; I have already used these up. I’ll share those projects in the next post.
 |
|
Pile of scraps from die cutting onsie card bases.
|
So, now I have the unembellished card fronts cut and card bases cut. Next up is embellishing the card fronts.
Thanks for stopping by! Have a moo’valous day!

Yes…I went nuts with my Big Shot and my new PTI Onesie die! I love the PTI dies…so thin…and sharp! And, no…didn’t cut my finger. 😀 The Onesie die fits perfectly on the 6 x 6 paper packs from SU! I have several…got them out and picked out prints I thought would look good made into a onesie.


After die cutting, I used a sticky note and wrote on the coordinating colors…I used the Welcome Neighbor DSP pack from the 2010 Sale-a-bration, the Patterns Pack III and the In-Color Patterns Pack (Hostess). Here’s a close up of each set.
 |
| Patterns Pack III |
 |
| Welcome Neighbor Designer Paper Pack |
 |
| In-Color Pattern Pack (Hostess) |
I am looking forward to cutting the card bases tomorrow night! Yippee!
Thanks for stopping by! Have a moo’valous day!

I love the chandlier image in Stampin’ Up!’s Grand Soriee. I had already unmounted this set a while back; I had not stamped the cover for the case. I wasn’t feeling to good today, so I decided to do some low key stamping. I stamped the cover and created a page in my SMASHing idea book.

There’s plenty of room to jot down ideas.

I just had to add some sparkle to it!

Thanks for stopping by! Have a moo’valous day!

I’m an SU! gal. I spent quite a bit of time debating my purchase…but I need sentiments for inside my cards AND I need to get cracking on baby stuff. Since my niece is gonna have a boy in August and we’re all going baby, I figured this would be a good time to do my son’s baby book, too. LOL

Uh…no…the cat didn’t arrive from PTI. I was trying to photograph my order and… I gotta give my cat some attention.

Three stamp sets…

…two dies and two ink spots. These are the first dies I’ve had from PTI. Interesting. Very compact, thin, space saving and probably, easy to loose. eek. I hope not…easy to loose, that is.
PTI sets come with a jewel case to store the sets. I tried to use them…but one set was simply too big and I could not see what I had…too confusing to read a clear sticker and have clear stamps. eek.
So…I used a SU! stamp case. On these two, I used the PTI labels. I put the labels on brown copy paper cut to insert size. I used brown paper, so I can immediately pick out SU! and PTI sets when I open my stamp drawer.


On the third one, there were two labels. I decided to stamp the sentiments and not use the stickers.

Here’s the inside:

Those particular three images didn’t stamp fully because of the bump on the back, the CS label I cut from the belly band that was on the original packaging. So I stamped those on white CS, trimmed them and then run them through Xyron.

TIP: I traced around each image with the paper piercer. Why? Sometimes I get more sticky than I want…glue strigs and stragglers on the edges of the images that I don’t want. I discovered if I traced the image with a sharp instrument, there are no exposed sticky stuff.


I’m loving this…the sentiments are in the same order as they are stamped on the cover. I can actually read the sentiment stamps through the cover, especially since they have been inked up.
Here’s the SMASHing idea book page for this stamp set:

I’m glad I stamped the sentiments…cuz I have a better idea of what I have.
Thanks for stopping by. Have a moo’valous day.
Today, I’m sharing some ideas for I plan to utilize in my counterfeit SMASH Book.
- Story Jar – I have some clear paint cans…but…ya know…I can also print these on cardstock and use them in my SMASH journal.
- Journal Pockets – I love these pockets. What an awesome way mix & match DSP. PLUS a neat journaling pocket.
- Mix & Match DSP – What you need to know to get started on mixing & matching DSP from DIFFERENT companies. I’ve done this with great success, I think. Check it out HERE.
Well, that’s enough to keep me busy for a couple of days!
Thanks for stopping by! Have a moo’valous day!

Lots of thoughts combined to create this idea. As a teen, I was active in 4-H and won many awards. Among those awards were four silver trays / bowls. They have been in storage for years.
If I’m going to keep something, I want to use it and enjoy it. I had no ideas on what to do with them other than look at them & dust them? No thank you. 😉 So in the bin they stayed.
Then one day, I was on Mish Mash, Michelle Wooderson’s blog. She had found some small vintage silver bowls. While she’s working on projects, she uses these to hold her buttons and such. I didn’t think much of it…until later I remembered the silver trays I had…

It’s nice to have them out & cleaned.
Here’s what I’m doing with one of them:

I was using this:

Cute box…dust free…but outta sight, outta mind.

So…I put the pretty box up on the ribbon rack with another of my trays. I’ll be using that tray for the parts of my mass produced cards. Easy to put away & pretty to look at.
What special items have you used as “found organization”?
Thanks for stopping by! Have a moo’valous day.

I’ve struggled with how to inventory my stamp sets. I hadn’t come up with anything useful in the several years I’ve been stamping. I tried this:

I stamped images in black on white cardstock, put it in a sheet protector & stuck it in a binder. That’s where it stayed. Nope…never really used it…never got the project completed. Not gonna work.
I tried half sheets of cardstock to be filed in a box…ditto.
Until the day before yesterday. That’s when the seed was planted. A fellow FLYBaby mentioned a “SMASHing” idea…cutting up old SU! catalogs to inventory her large collection of stamps – SMASH Book style. I think she’s onto something. I had an extra current year catalog…I cut it up! It was hard…but it was an extra. 😉 What do I put it in?
Aha! I run to the hall closet and pull out this:

How do I get them in…masking tape…I taped in THREE. Then I grabbed the Mono Multi and glued ’em all in! For some, I cut out the projects shown in the catalog if it was something I wanted to case.
Today, I took it with me and when an idea for a page or use for a current stamp set hit me…I wrote it down.

I do this for all the current stamp sets…not perfect…but it gets my inventory started. What about those retired stamp sets? Or those that I have stamped CS sheets for? THIS:
 |
| TRIM ‘ EM ! |
 |
| COLOR ‘ EM! |
 |
| GLUE ‘ EM! |
I think I’m gonna like this one!
Thanks for stopping by! Have a moo’valous day!

One thing about SMASH books…anything goes. Any subject, any type of everyday material.

Every once in a while, I come across an inspirational gem. And really, don’t have anywhere to put it so I can be inspired by it AGAIN…ya know.
I received this quote in my CPA newsletter email yesterday morning:

So, I whipped out my “handy dandy notebook”…Blues Clues, anyone?

…and wrote it down.
Got home…ripped it out…rummaged for some stickers. Found some stickers in an SU! Simply Scrappin’ Kit…and pasted ‘er in!

It don’t get easier that that! Ahem…pardon my grammar.
Thanks for stopping by! Have a moo’valous day!

My SMASH book got fat. Yes, it would still close, but eventually, the cover would’ve warped. So I…gasp…took off the O-wires and used some hinged, snap close rings. Now I can add & remove pages. I know…but I love it! I even NAMED my book and created a cover! Lookie:
 |
| Bits & Pieces – SMASH book cover |
Here’s a closer look at the modified binding:
 |
| Modified SMASH book binding – replaced O-wires with hinged rings. |
One of the things I will use my journal for is for reference while scrapbooking. I’m currently scanning my old negatives and making sure I have prints for all the negatives I have. I am shredding the negatives after they have scanned successfully. I am putting all the pictures in order best I can by Spring 19XX, Summer 19XX, Fall 19XX and Christmas 19XX. Most, I can easily tell which is which. But for some, time blends. I ask, Did I do this in 1992 or 1993? Was this before I did this? Or after? Hmmm…
And, if I don’t write it down, I gotta do all that thinking AGAIN! next time I find another picture I have a hard remembering WHEN.
Last year, I was decluttering my old calendars / date books. I took a college ruled notebook and just wrote down the month name & year and jotted down any specific dates / information that was interesting / important. And yep…shredded those after I got done. I did run across a couple of date books that would almost be journals in themselves; those I did not shred, nor have I recapped (for the moment.)
I took these handwritten pages and put them in my SMASH book. But first…gotta have some pretty paper to attach ’em to and don’t want to HIDE all that pretty designer paper I’ve already put in the book!
 |
| New SMASH book pages. |
 |
| Even the cat approves. “Good job, Mom!” |
 |
| SMASH book page. |
All products, with the exception of the original sketch book, are from my stash. I’m only out $11.00. And I have something I really love to use.
Thanks for stopping by. Have a moo’valous day!

Remember all this – the die cut doilies, butterflies and strips ‘n’ scraps of beuatiful SU! designer paper – I showed ya a few days ago?

Pick one from each pile, put ’em together; repeat THREE times. I got these:
 |
| Ain’t dey purty? |
 |
| Thank You #1 |
 |
| Thank You #1 (Inside & Envelope) |
 |
| Thank You #2 |
 |
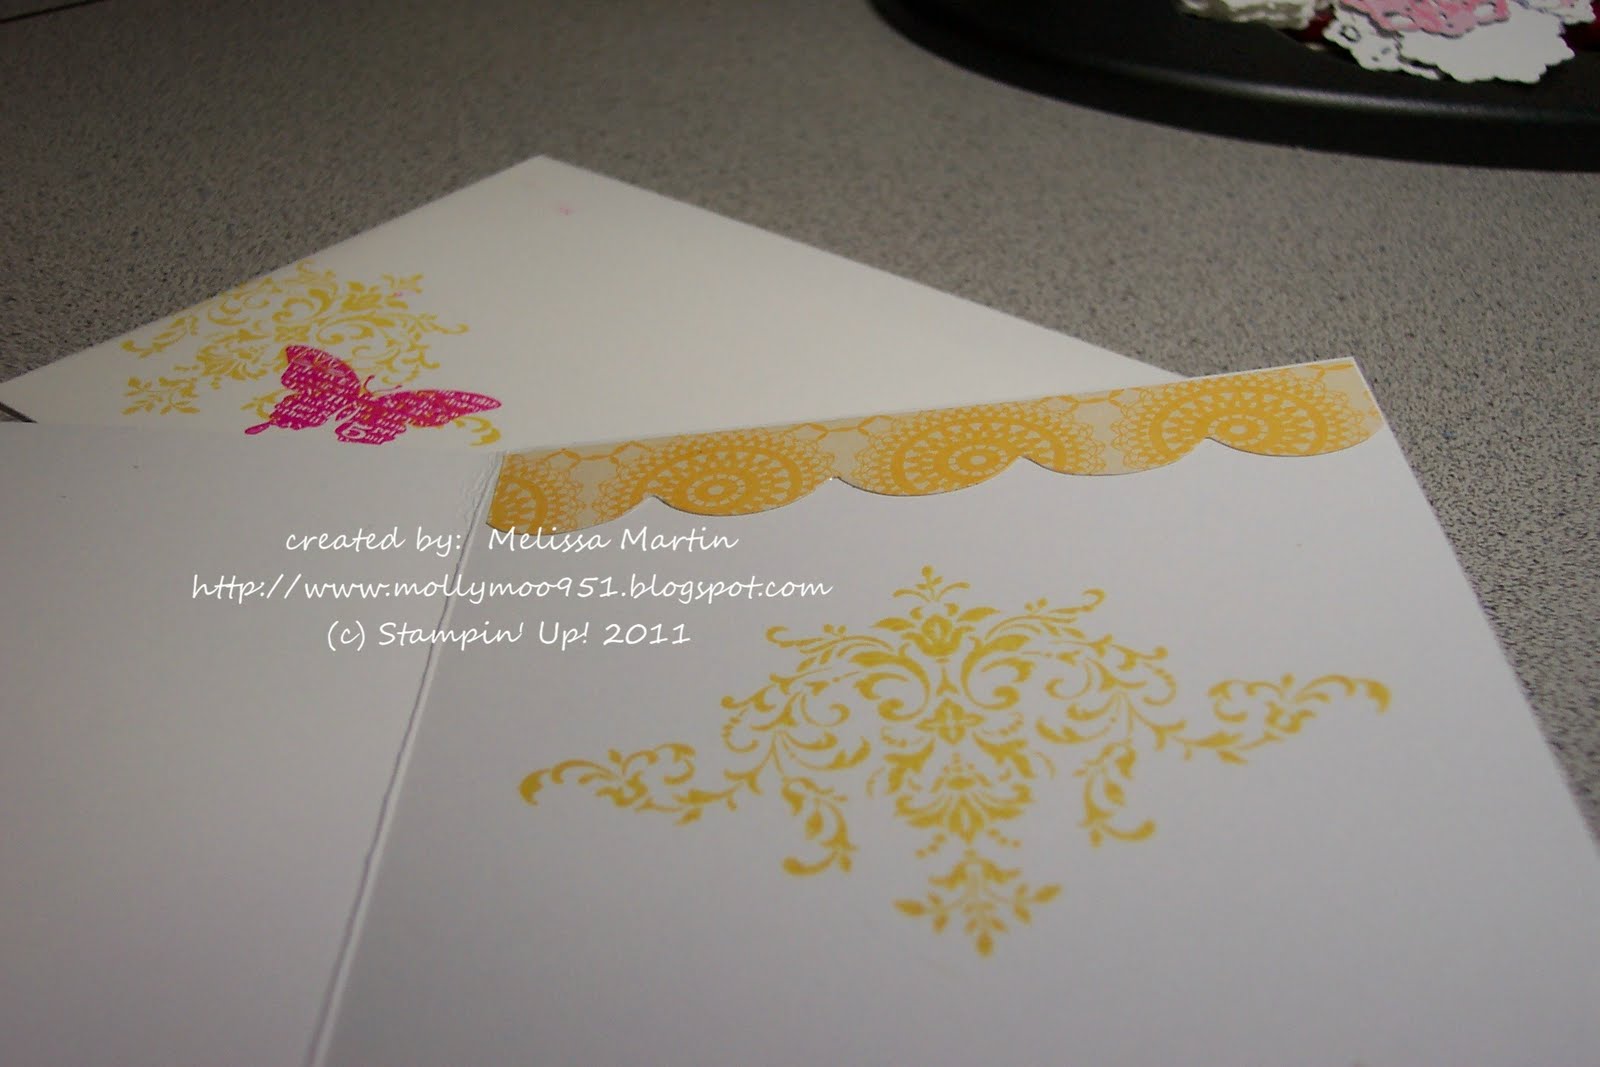
| Thank You #2 (Inside & Envelope) |
 |
| Thank You #3 |
 |
| Thank You #3 (Inside & Envelope) |
This time, I did the insides and the coordinating envelopes. I did not have any thank you sentiments to stamp inside; however, I did find a list of thank you sentiments on SCS that I will hand write inside the card depending on who or what the card is for. So while the cards were mass produced, they will still have a unique personal touch especially for the recipient.
Thank you for stopping by. Have a moo’valous day!
SUPPLIES (all supplies Stampin’ Up! unless indicated otherwise)
Stamps: Wonderful Words, Bliss
Ink: Basic Black, Pretty in Pink, Daffodil Delight, Pumpkin Pie, Melon Mambo, Wisteria Wonder
Paper: PTI White, Flirtatious DSP
Accessories: Baker’s Twine – White; Button Boutique Sherbet; paper piercer & mat, paper snips, Big Shot, Beautiful Butterflies (die), Janome’ sew mini & white thread, mono multi, Tasteful Trims (die), corner rounder.
Recent Comments